Purpose
This guide will highlight the available options within the Kap editor. The options within are the default; other alternatives may appear when you turn on specific plugins. We will also take a look at the export menu.
Introduction to Editor Options
- A: Size width
- B: Size height
- C: Size percentage
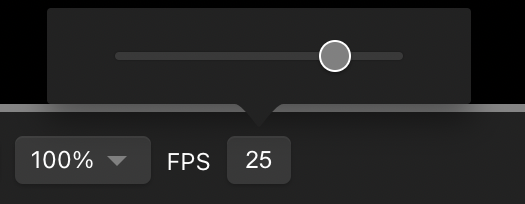
- D: Frames per second
- E: File format selector
- F: Export location selector
- G: Conversion

Options Overview
Size Width and Height
These two fields allow you to customize the size of the exported recording by inputting a numerical value.
Size Percentage
This field allows you to customize the size by a percentage value. The available options are as follows:
- Original (keeps the size at 100%)
- 75%
- 50%
- 33%
- 25%
- 20%
- 10%
Frames per second
You can control the exported recording’s frames per second. The lowest value is five, and the highest is 30. You can input a number within the field or slide the selector to adjust it instead.
File Format Selector
This field allows you to select the format for the exported file. The available options are as follows:
- GIF
- MP4 (H264)
- WebM
- MP4 (H265)
- MP4 (AV1)
- APNG
Export Location Selector
This field allows the selection of an exported file’s destination. The options may change depending on what plugins you have toggled on. The default options are:
- Save to disk: Save the file to a folder on the system.
- Copy to clipboard: Copy the file to the clipboard to paste in the desired location.
- Open with: List available system applications that you can use to open the file.
- Get plugins: Directs to the plugin options within the app’s preferences.
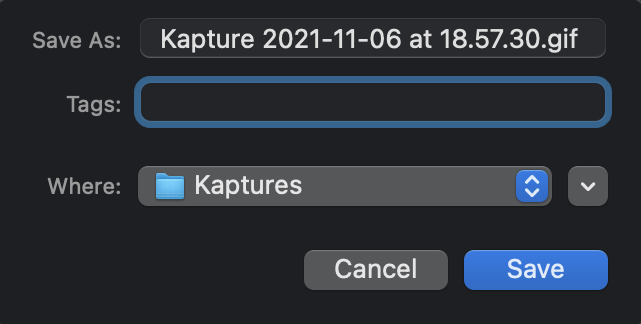
Conversion
This field allows recordings to be saved as exported files once you set all of the desired parameters. You can also customize each file’s name, tag(s), and destination.
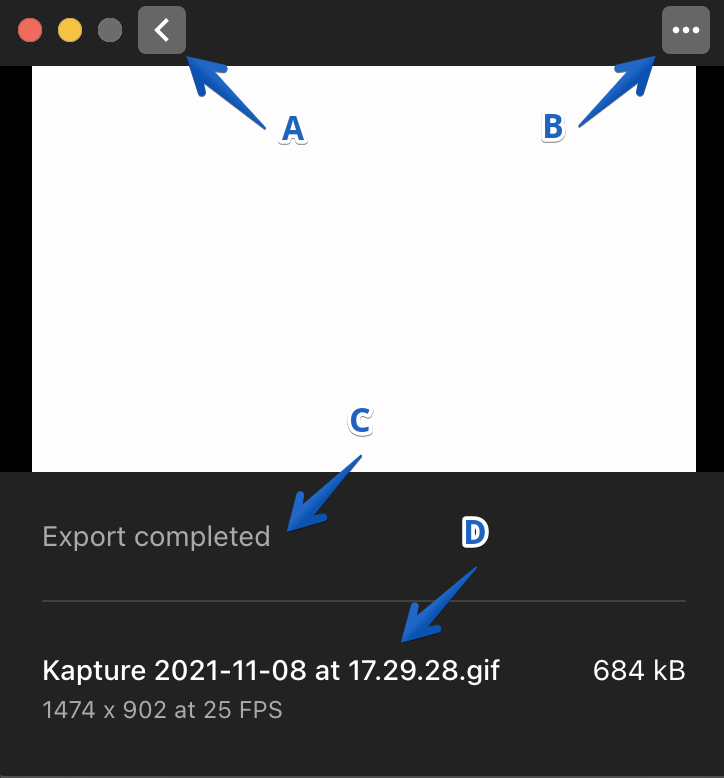
Export Menu
- A – Back button: Takes you back to the editor.
- B – Ellipsis: Contains to options to copy the exported file to the clipboard or view it in the Finder.
- C – Export status: Display the status of the exported file with a timestamp for its completion.
- D – Export history: Display completed exports within the current session.